Hey there! If you’re reading this, chances are you’re either a building manager, a maintenance tech, or maybe even a contractor who’s staring down an elevator door install that’s giving you that “wait, did I skip a step?” feeling. Spoiler: I’ve been in your shoes. I run an elevator door system supply company—we’ve shipped parts to jobs big (skyscrapers downtown) and small (a 3-story office out in the suburbs), and let me tell you, 9 times out of 10, door system issues post-install don’t come from bad parts. They come from cutting corners during installation. Elevator Door System

Today, I’m breaking down the stuff we’ve learned over 10+ years that actually works—no fancy jargon, no stuff that only makes sense if you’re a code textbook. Let’s dive into the best practices that keep our doors running smooth, and save everyone headaches (and callbacks) down the line.
First off: Don’t skip the pre-install check. I know, you’re busy, the job site’s already running behind, and that elevator door box looks good on the truck. But hear me out—we’ve sent doors that had a bent track or a sensor that was nicked in shipping, and the first thing a tech does is waste an hour trying to align something that’s already broken. Here’s what we actually do on every install before we even touch the hoistway: lay all the parts out on a dolly or a clean section of the floor (no gravel, no random screws), check every door panel for dents, the track for straightness (run a straight edge along it—if there’s a gap bigger than a credit card, send it back), and test the safety sensors. We even test the microswitch by hand to make sure it clicks. Last quarter, we caught a batch of sensors that had a faulty wiring harness before they hit the job site—saved our clients $2k in delayed labor, no cap.
Next, get the hoistway ready before the door parts show up. This is the #1 mistake contractors make: they wait until the door boxes are on-site to finish the hoistway walls. But if the walls aren’t plumb (I’m talking within 1/8 inch over 10 feet—don’t guess, use a level) and the landing sills are flat, your door’s gonna fight that wall every single time it opens and closes. I’ve seen installers just “shim the gaps” between the door frame and the wall, and 6 months later, the door’s sticking because the shims compressed. Here’s the pro move: mark the centerline of the hoistway on each floor first, then check that the landing door openings are exactly aligned from floor to floor. If they’re off even a quarter inch, you gotta adjust the wall before you mount the frame. No exceptions. Oh, and clear the hoistway of loose debris—we had a job once where a small piece of drywall fell into the track during install, and it jammed the door so bad they had to pull the whole unit out to fix it. Just take 10 minutes to sweep, okay?
Mounting the frame: Don’t just bolt it to the wall and walk away. This is where alignment makes all the difference. First, secure the temporary brackets that come with the door frame—they’re not just for show. Use a transit level or even a laser level (way faster than a manual level, trust me) to make sure the top of the frame is level front to back, and side to side. Then, check the gap between the door and the frame when it’s closed—should be uniform all around, like, no bigger than a dime. If one side has a bigger gap, you’re gonna get air leaks, noise, and maybe even kids sticking their fingers (we won’t get into OSHA stuff, but you know that’s a bad call). Also, use the right bolts. Don’t grab random ones from the job site bin—use the stainless steel ones we include (or ones that match our specs) because regular bolts rust, and a rusty bolt in the frame can cause it to shift over time. We’ve had clients come back 2 years later because their frame bolts were plain steel, and they had to replace half the frame.
Now, the door panels—this is the part that looks straightforward, but people mess it up all the time. First, hang the car door panels before the landing ones, duh. And when you lift the panels, don’t use the plastic straps that come around them—they’re not made for heavy lifting. Use a panel lifter, or if you don’t have one, two people to carry them by the frame, not the edges. Dropping a panel even a little can bend the edge, and that’ll make it rub when it slides. Once the panels are on, adjust the roller carriers (the little wheels that run along the track) so the panel sits evenly in the track. Then, test the gap between adjacent panels when they’re closed—should be super tight, like, you can barely slip a credit card between them. If there’s a gap bigger than that, it’ll let in noise, dirt, and even stop the door from closing all the way if something small gets stuck. Last year, we had a client who didn’t adjust the panel gaps, and their elevator kept beeping and stopping because a piece of gum got stuck in the gap.
Sensors and safety features: This is non-negotiable. You can’t skip testing the safety edges and the photo eyes. Wait, let’s clarify—photo eyes are those little infrared things that detect if something’s in the door way, right? A lot of installers just mount them and call it good, but you gotta aim them correctly. The beam should be level, and you should test it by sticking a pencil in the middle of the beam—if the door doesn’t reverse, you messed up the aim. And the safety edge (the rubber strip on the edge of the door) isn’t just for show. You have to test it with pressure too, not just the photo eye. Push the edge gently when the door’s closing—if it doesn’t reverse immediately, adjust the tension on the edge’s switch. Also, make sure both the car door safety edge and the landing door safety edge are working. We had a job where the landing door safety edge was disconnected, and a maintenance tech got pinched when he was adjusting the door. Don’t be that guy.
Wiring: Keep it neat, keep it secured. We see so many installs where wiring is just hanging loose, ziptied to random parts of the door frame. That’s a disaster waiting to happen. The wires get pinched when the door moves, or they get snagged by tools later on, or even get chewed by mice if the building is under construction. Use the wire channels that come with the door system (we include them for a reason!) and ziptie the wires every 6 inches. Also, label the wires when you connect them—write “photo eye” or “safety edge” on the ziptie or the wire itself. 6 months later when you need to troubleshoot, you won’t be guessing which wire does what. Pro tip: Don’t run wiring near moving parts, like the door tracks or the roller arms. We had a client who ran a wire right next to the track, and after a year, the track wore through the insulation, shorting the whole door system. That’s $5k in repairs, all because of a loose wire.
Final testing and adjustment: Don’t just hit “test” once and sign off. You gotta test the door through its full cycle—open, close, open, close—like 20 times in a row. Check for noise, check if it’s rubbing anywhere, check if the gaps stay uniform, check all the safety features again. Also, test it with a light load—like a 10-pound box—placed in the door way to make sure it reverses. And here’s something most people forget: test it at different speeds if your system has adjustable speeds. A lot of installers set the speed once and don’t touch it, but if the door’s heavy (like a 4-foot-wide door for a freight elevator), it might need a slower speed on the lower floors to avoid slamming. We adjust that for every install, because slamming doors wear out faster and annoy the heck out of building occupants.
Wait, one last thing—documentation. I know, it’s boring, but it matters. When you finish the install, write down the settings you used, like the roller adjustments, the sensor distances, the speed settings. Give a copy to the building manager, keep a copy for yourself. If something goes wrong later, you don’t have to guess what the settings were—you can just pull up the notes. We had a client call us at 7 AM once, panicking because their door wouldn’t close. We asked for the adjustment settings, and they had them written down, so we walked them through fixing it in 5 minutes instead of sending a tech out for $800. Win-win.
Look, I get it—installing an elevator door system is a job that’s got a hundred moving parts, and it’s easy to rush through the small stuff to hit a deadline. But the stuff I just talked about? It’s the stuff that makes the door run for 10+ years without a problem, not the fancy parts or the big brand names. We’ve seen installers cut every corner, and the doors break 6 months later. We’ve seen installers follow these steps, and the doors still work like new after 5 years.
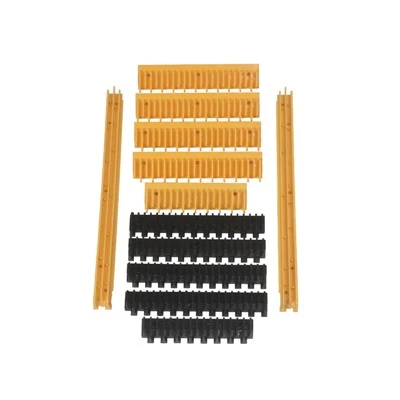
If you’re working on an elevator door install and you need parts, or you want to chat through a tricky step, we’re here. We supply reliable parts, and we’ve got techs on call who can walk you through whatever you need, no stuffy service fees. Hit us up for a consultation, let’s make sure your elevator doors go in right the first time.
Elevator Door System References:
- National Elevator Industry Educational Program (NEIP). Elevator Door Installation and Maintenance Best Practices. 2021.
- American Society of Mechanical Engineers (ASME). A17.1 Safety Code for Elevators and Escalators. 2022 Edition.
- Elevator World Magazine. “Common Installation Mistakes That Lead to Door System Failures.” October 2020.
- International Code Council (ICC). International Building Code (IBC) Chapter 30: Elevators and Conveying Systems. 2021.
- The Elevator Technician’s Handbook. 4th Edition. BNI Publications, 2019.
Huzhou Kenai Elevator Technology Co., Ltd.
As one of the most professional elevator door system manufacturers and suppliers in China, we also support custom service. We warmly welcome you to wholesale advanced elevator door system made in China here from our factory. For more cheap products, contact us now.
Address: No. 6666, Qianghua West Road, Dongqian Street, Nanxun District, Huzhou City, Zhejiang Province, China
E-mail: info@kenailift.com
WebSite: https://www.kenaielevator.com/
